Understanding ASME B36.10 Seamless Pipes and Their Importance
What are ASME B36.10 Seamless Pipes?
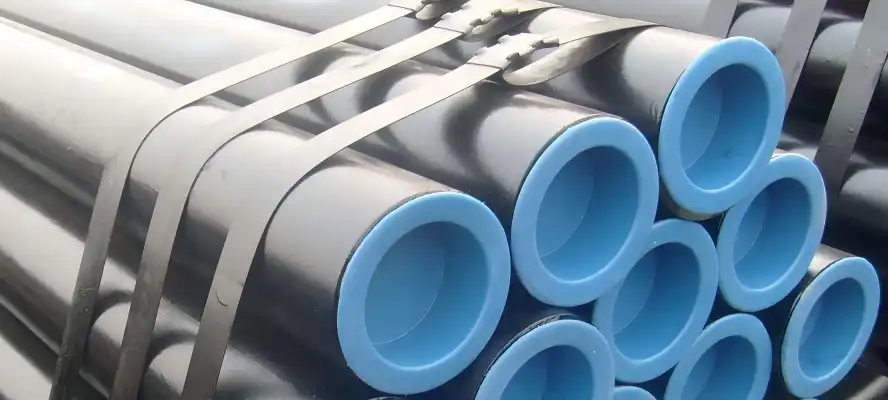
ASME B36.10 seamless pipes are high-quality, standardized pipe fittings used in various industrial applications. These pipes are manufactured without any welded seams, ensuring uniform strength and reliability throughout the entire pipe body. The ASME B36.10 standard specifically covers wrought steel butt-welding fittings, which are crucial components in piping systems across industries such as oil and gas, petrochemical, and power generation.
Why Regular Inspection is Crucial?
Regular inspection of ASME B36.10 seamless pipes is essential for several reasons: 1. Safety: Ensuring the structural integrity of pipes prevents leaks and potential hazards. 2. Compliance: Meeting industry standards and regulatory requirements. 3. Performance: Maintaining optimal flow and pressure characteristics. 4. Cost-effectiveness: Identifying issues early can prevent costly repairs or replacements. 5. Longevity: Proper maintenance extends the lifespan of piping systems.
Frequency of Inspections
The frequency of inspections for ASME B36.10 seamless pipes depends on various factors, including: 1. Operating conditions (temperature, pressure, and fluid properties) 2. Environmental factors (corrosive atmospheres, exposure to elements) 3. Age of the piping system 4. Previous inspection results and historical data 5. Regulatory requirements specific to your industry
Generally, a comprehensive inspection should be conducted annually, with more frequent visual checks performed quarterly or semi-annually. However, high-risk or critical applications may require more frequent inspections.
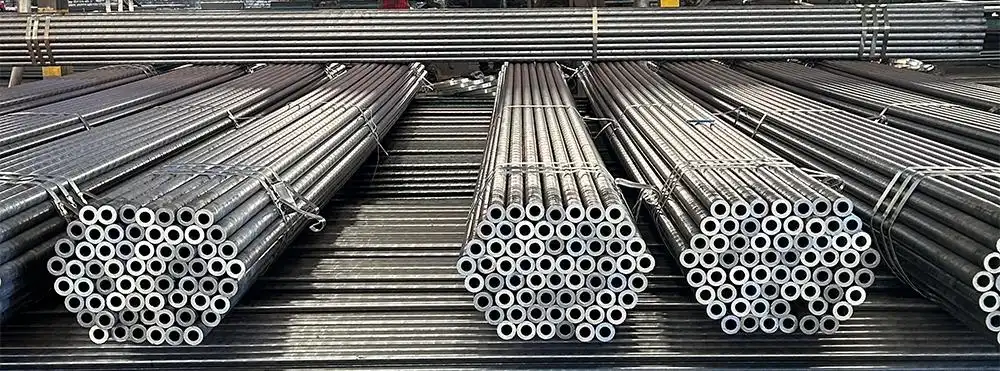
Essential Inspection Techniques for ASME B36.10 Seamless Pipes
Visual Inspection Methods
Visual inspection is the first line of defense in maintaining ASME B36.10 seamless pipes. This method involves a thorough examination of the pipe's surface for visible defects or signs of wear. Key aspects of visual inspection include: 1. Surface condition assessment: Look for signs of corrosion, pitting, or scaling. 2. Deformation check: Identify any dents, bulges, or other physical damage. 3. Weld integrity: Examine welded joints for cracks or irregularities. 4. Coating evaluation: Assess the condition of protective coatings or insulation. 5. Flange face inspection: Check for scratches, gouges, or uneven surfaces on flange faces. To enhance visual inspections, consider using tools such as borescopes or remote video cameras for hard-to-reach areas. Proper lighting and magnification devices can also improve the accuracy of visual assessments.
Non-Destructive Testing (NDT) Techniques
Non-destructive testing methods are essential for thorough inspection of ASME B36.10 seamless pipes. These techniques allow for in-depth examination without damaging the pipe material. Common NDT methods include: 1. Ultrasonic Testing (UT): Uses high-frequency sound waves to detect internal flaws and measure wall thickness. 2. Radiographic Testing (RT): Employs X-rays or gamma rays to create images of the pipe's internal structure. 3. Magnetic Particle Inspection (MPI): Identifies surface and near-surface defects in ferromagnetic materials. 4. Eddy Current Testing (ECT): Detects surface and sub-surface flaws using electromagnetic fields. 5. Penetrant Testing (PT): Reveals surface-breaking defects through the application of a penetrating liquid. Each NDT method has its strengths and limitations, so it's often beneficial to use a combination of techniques for comprehensive inspection. The choice of NDT methods should be based on the specific requirements of your piping system and the types of defects you're most likely to encounter.
Wall Thickness Measurement
Accurate wall thickness measurement is crucial for assessing the remaining life of ASME B36.10 seamless pipes. This process helps identify areas of potential weakness due to corrosion or erosion. Key considerations for wall thickness measurement include: 1. Ultrasonic thickness gauges: These devices provide quick and accurate readings without the need for pipe disassembly. 2. Grid mapping: Create a systematic grid pattern for measurement points to ensure comprehensive coverage. 3. Trend analysis: Compare current measurements with historical data to track degradation rates. 4. Critical locations: Focus on areas prone to accelerated wear, such as elbows, tees, and reducers. 5. Documentation: Maintain detailed records of all measurements for future reference and analysis. Regular wall thickness measurements can help predict when pipes may need replacement or repair, allowing for proactive maintenance planning and minimizing unexpected downtime.
Implementing an Effective Inspection Program for ASME B36.10 Seamless Pipes
Developing an Inspection Plan
Creating a comprehensive inspection plan is essential for maintaining the integrity of ASME B36.10 seamless pipes. A well-structured plan should include: 1. Scope definition: Clearly outline which pipes and components are to be inspected. 2. Inspection intervals: Establish a schedule based on risk assessment and regulatory requirements. 3. Inspection methods: Specify which techniques will be used for each type of inspection. 4. Personnel requirements: Identify the qualifications and training needed for inspection staff. 5. Documentation procedures: Define how inspection results will be recorded and stored. When developing your plan, consider consulting industry standards and best practices, such as API 570 for piping inspection codes. Tailor your plan to your specific operating conditions and risk factors to ensure optimal effectiveness.
Training and Certification for Inspectors
Proper training and certification of inspection personnel are crucial for ensuring accurate and reliable results. Key aspects of inspector training include: 1. Technical knowledge: Understanding pipe materials, fabrication methods, and failure modes. 2. Inspection techniques: Proficiency in various NDT methods and visual inspection procedures. 3. Safety protocols: Training in proper safety procedures for working with piping systems. 4. Regulatory compliance: Familiarity with relevant industry standards and regulations. 5. Certification programs: Pursuing recognized certifications such as API, ASNT, or NACE. Investing in ongoing training and certification for your inspection team helps maintain high standards of quality and reliability in your inspection program.
Data Management and Analysis
Effective data management and analysis are critical components of a successful inspection program for ASME B36.10 seamless pipes. Key considerations include: 1. Digital record-keeping: Implement a robust system for storing and organizing inspection data. 2. Trend analysis: Use historical data to identify patterns and predict future maintenance needs. 3. Risk-based inspection (RBI): Prioritize inspection efforts based on the likelihood and consequences of failure. 4. Reporting tools: Develop clear, concise reports that communicate inspection findings effectively. 5. Integration with asset management: Link inspection data with broader asset management systems for comprehensive oversight. By leveraging advanced data management and analysis techniques, you can gain valuable insights into the condition of your piping systems, enabling more informed decision-making and proactive maintenance strategies.
Conclusion
Regular inspection of ASME B36.10 seamless pipes is a critical aspect of maintaining safe and efficient piping systems. By implementing a comprehensive inspection program that includes visual examinations, non-destructive testing, and thorough data analysis, you can ensure the longevity and reliability of your pipe installations. Remember to tailor your inspection approach to your specific operating conditions and stay up-to-date with industry best practices. With diligent inspection and maintenance, you can minimize downtime, reduce costs, and maintain the highest standards of safety and performance in your piping systems.
FAQs
How often should ASME B36.10 seamless pipes be inspected?
The frequency depends on factors like operating conditions and regulatory requirements, but generally, a comprehensive inspection should be conducted annually, with more frequent visual checks.
What are the key areas to focus on during visual inspection?
Focus on surface condition, deformation, weld integrity, coating evaluation, and flange face condition.
Why is wall thickness measurement important?
It helps assess remaining pipe life and identifies areas of potential weakness due to corrosion or erosion.
What certifications should pipe inspectors have?
Recognized certifications from organizations like API, ASNT, or NACE are beneficial for ensuring inspector competence.
Expert ASME B36.10Seamless Pipe Inspection Services | QinSteel
At QinSteel, we offer comprehensive inspection services for ASME B36.10 seamless pipes, leveraging our 20 years of industry expertise. Our certified inspectors use cutting-edge NDT techniques to ensure the highest standards of quality and reliability. As a leading manufacturer and supplier of pipe fittings, we understand the critical importance of regular inspections. Contact us at info@sxqinsteel.com to learn how our expert services can enhance the safety and longevity of your piping systems.
References
API 570. (2016). Piping Inspection Code: In-service Inspection, Rating, Repair, and Alteration of Piping Systems.
ASNT. (2020). Recommended Practice No. SNT-TC-1A: Personnel Qualification and Certification in Nondestructive Testing.
Becht, C. (2019). Process Piping: The Complete Guide to ASME B31.3. ASME Press.
NACE International. (2017). Control of Internal Corrosion in Steel Pipelines and Piping Systems.
Varga, T., & Torok, I. (2018). Non-Destructive Testing Methods for Metal Pipes: A Comprehensive Review. Materials, 11(11), 2201.
